Sentiment Analysis using FTP2SF

Sentiment analysis is increasingly being used to identify trends and potential problem areas within enterprise customers. Using FTP2SF and AWS these Enterprise services can be made available for Small to Medium customers also.
AWS Setup
We love AWS and have built FTP2SF on AWS to enable easy access to FTP, SFTP, Azure Blob and AWS S3 services. It’s the last service that we will use to create our sentiment analysis service. The overall architecture is very simple and mirrors a great post here
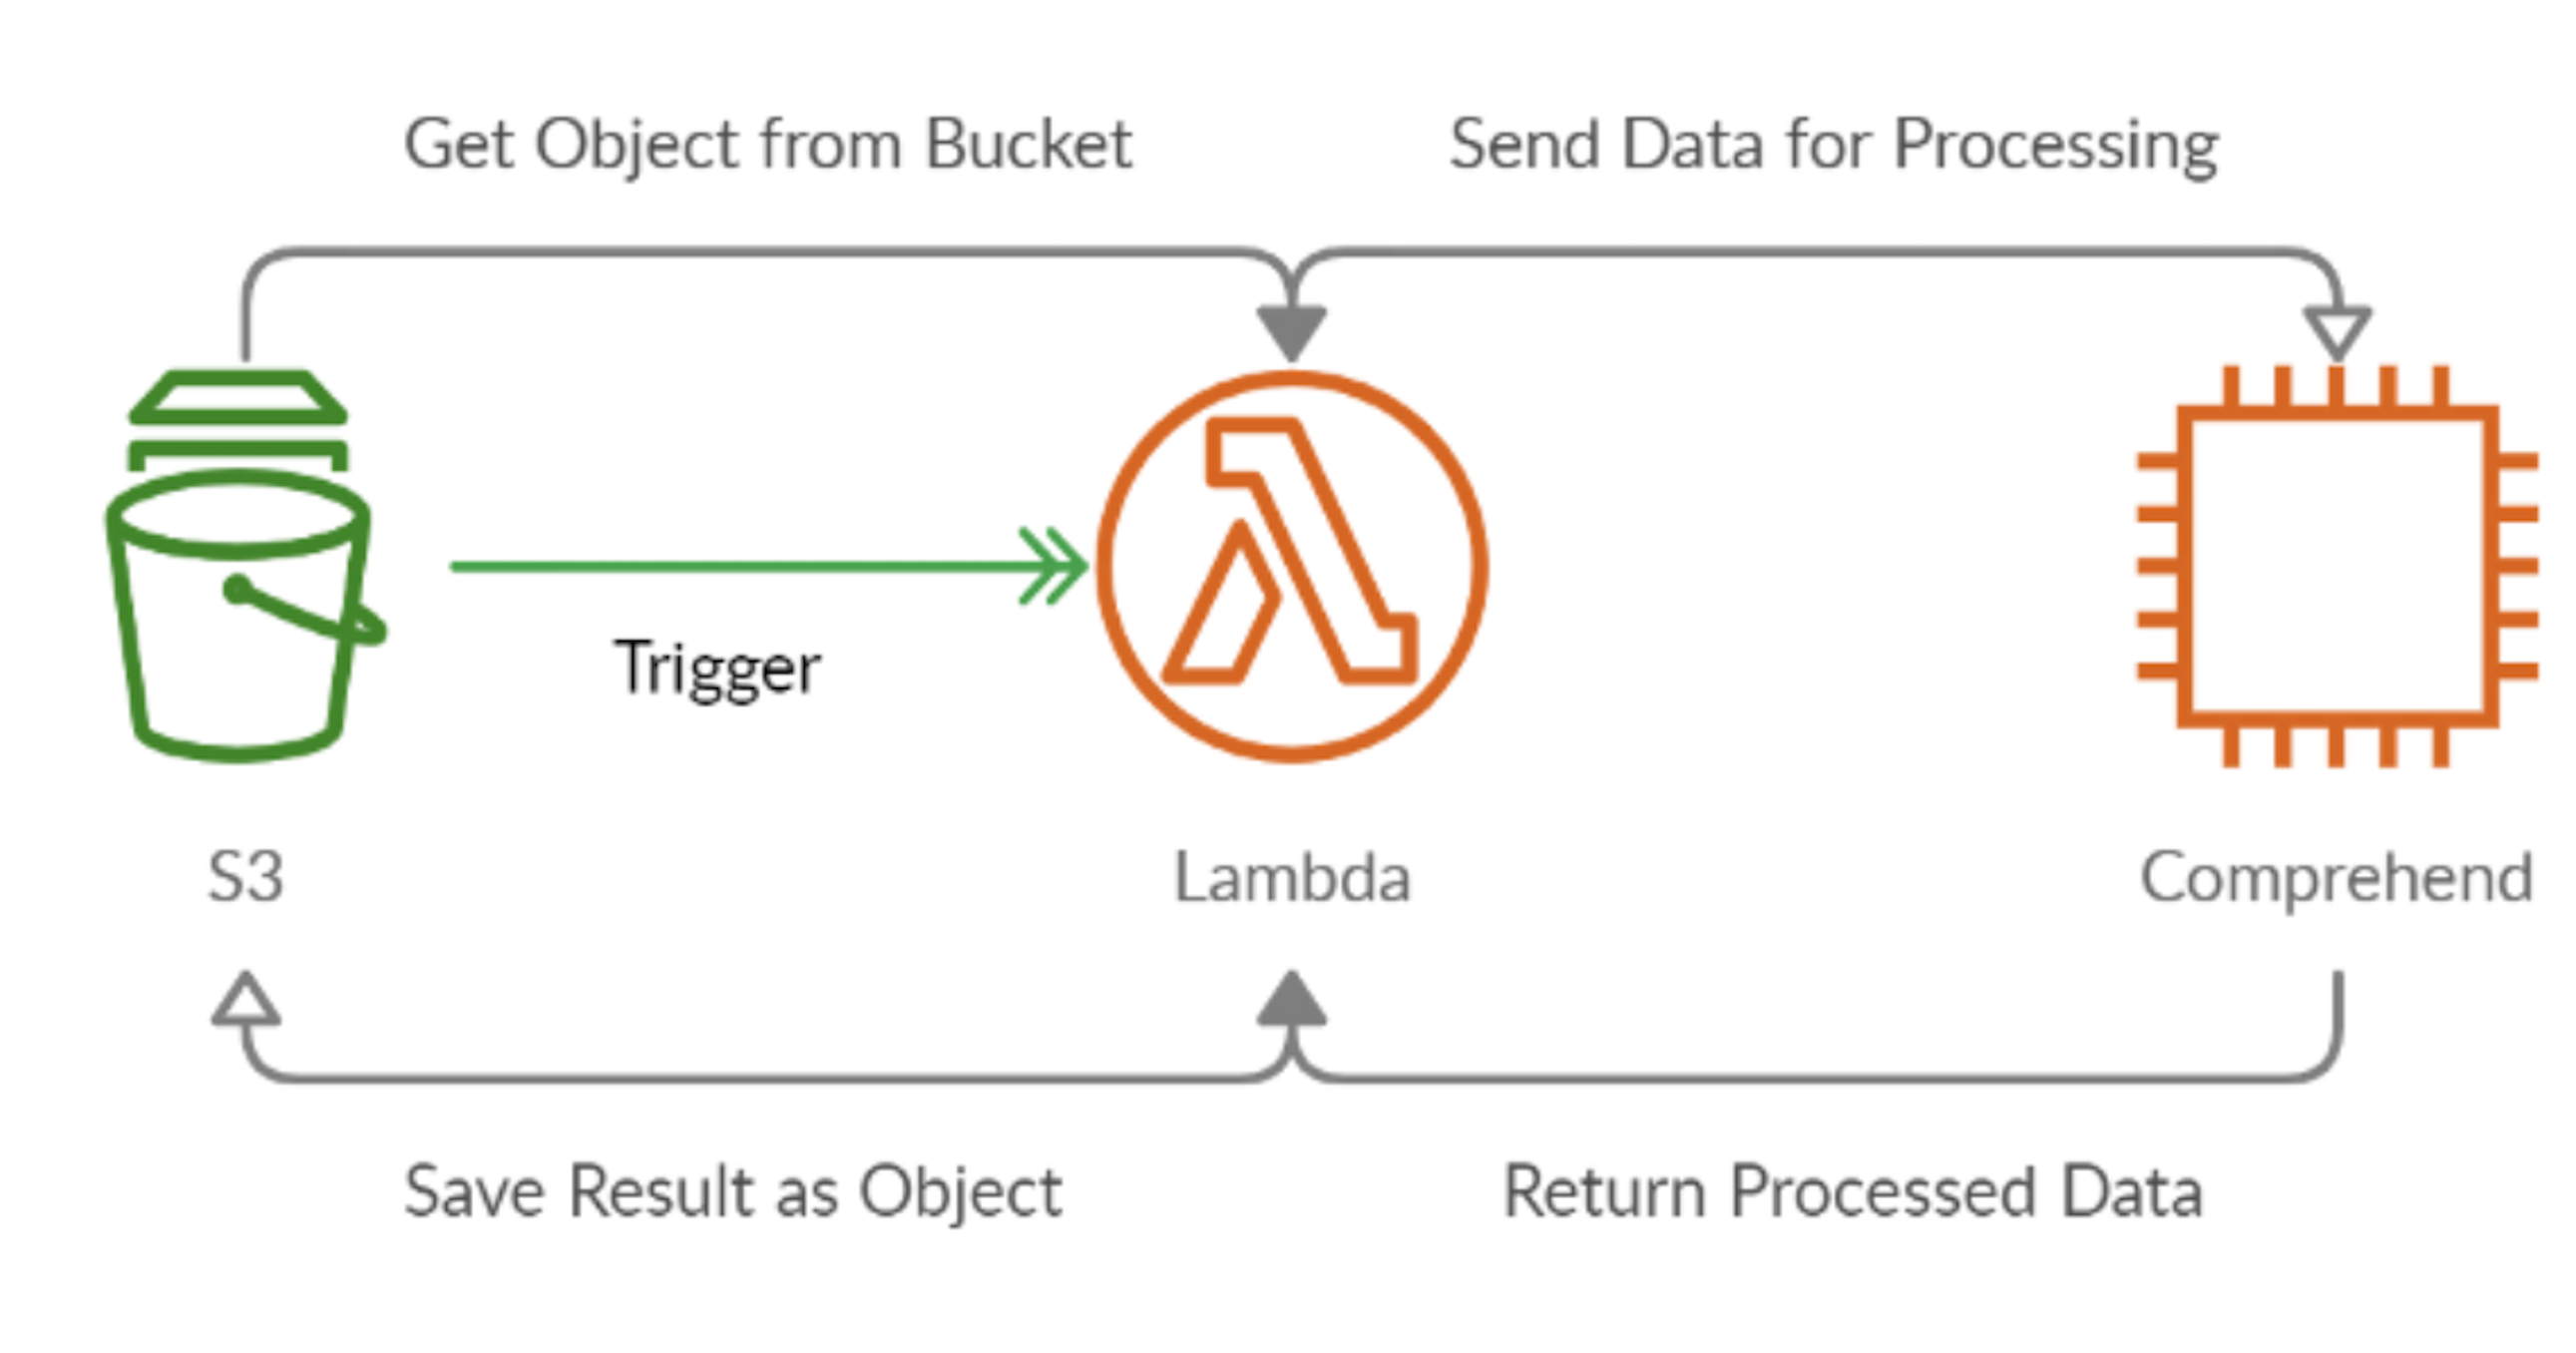
You can use this approach if you want to use node.js, I prefer my Lambda functions with .NET core, so I’ve implemented the same approach and published. Whatever your language the overall result is that each time you write a file to S3 – you get sentiment matching from Comprehend output … to test this is upload a file to your AWS S3 bucket and a corresponding file with the sentiment analysis will be written.
Note that we only include the Input “folder” on our AWS Bucket, and we ignore anything that is a directory.
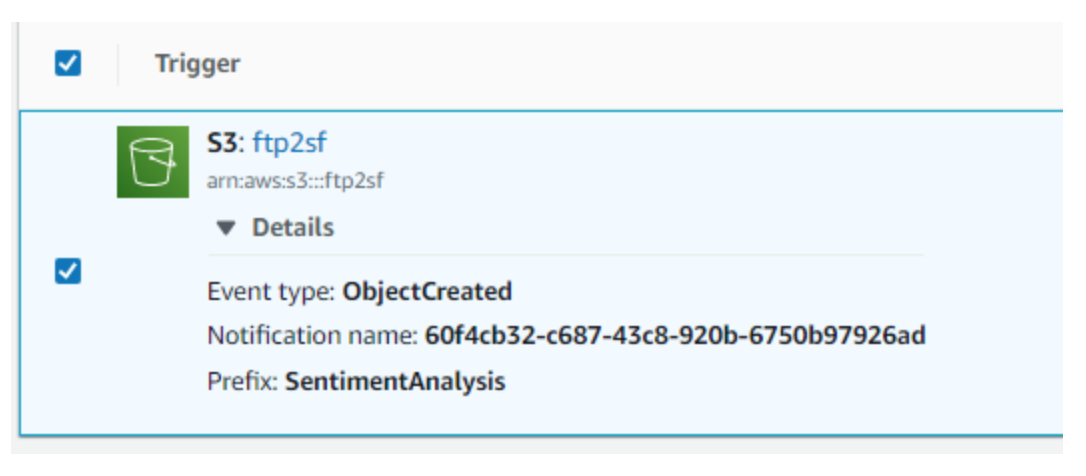
Make sure you grant the Lambda function access to Comprehend and S3! Once you have your code in place, it needs to be triggered using a Lambda function, this is a simple process from the console, and it should end up looking like the below.
FTP2SF
Writing to AWS S3 using FTP2SF is easy! There's plenty of examples in the documentation but setup your S3 account and then execute FTP2SF.FTP.Put(“S3”, “SentimentAnaylsis\\Input\\filename”, blob).
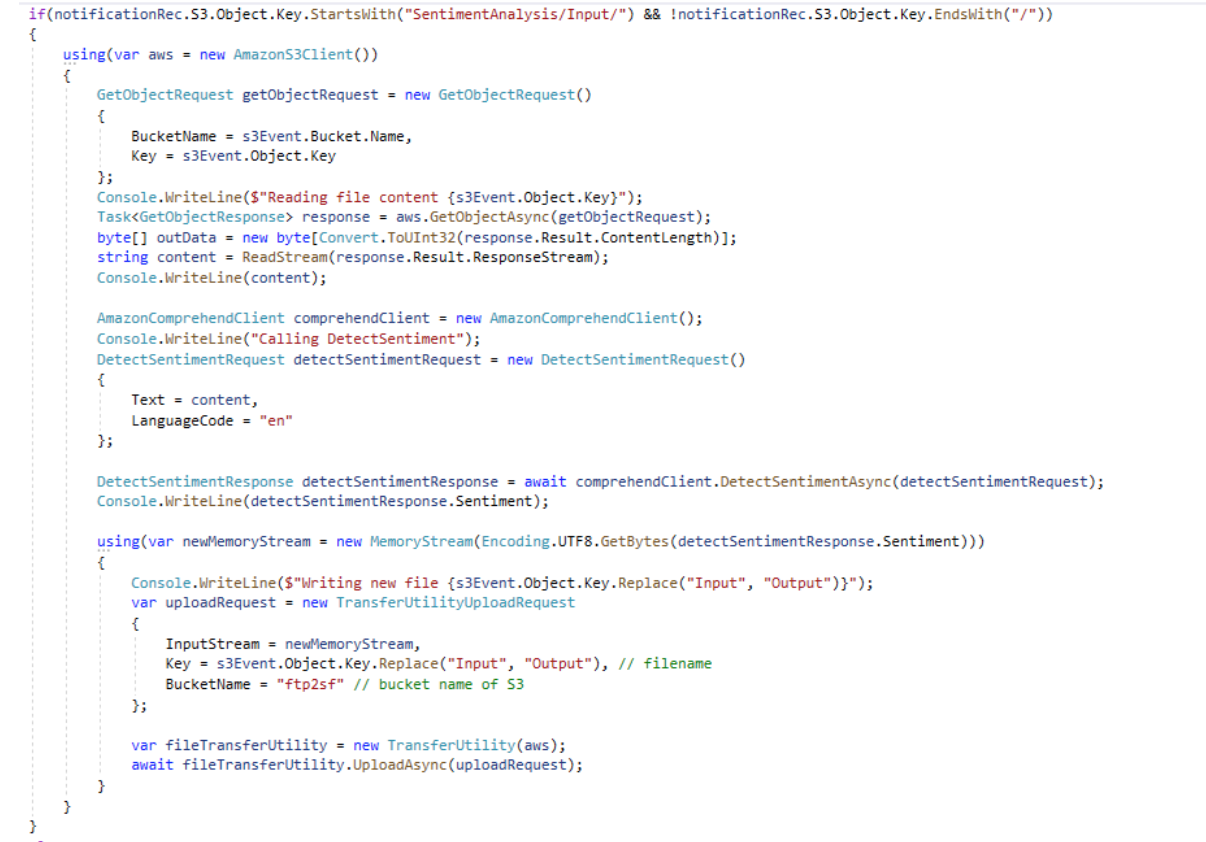
The handler will write the contents of an object to S3 and then read the contents of the generated Sentiment Analysis – then update the matching Salesforce object. We do need to cater for the Async nature of the AWS processing so we will implement this using two queueable jobs; one to write the file and enqueue the second queueable to read the response. The great thing about queueable is you can enqueue them for a specific number of minutes in the future – in our case we pass the filename and 10 mins to give the job plenty of time to run.
Salesforce Email
Finally, once we have the pieces in place, we create a custom field called “Sentiment”, we will make this a picklist value and match the string value that we will be returned by the SentimentAnaylsis AWS job.
// Summary:
// Constant MIXED for SentimentType
public static readonly SentimentType MIXED;
//
// Summary:
// Constant NEGATIVE for SentimentType
public static readonly SentimentType NEGATIVE;
//
// Summary:
// Constant NEUTRAL for SentimentType
public static readonly SentimentType NEUTRAL;
//
// Summary:
// Constant POSITIVE for SentimentType
public static readonly SentimentType POSITIVE;
To make this more user friendly we also create a function field and display a rating based on smiley faces.
Example as below,
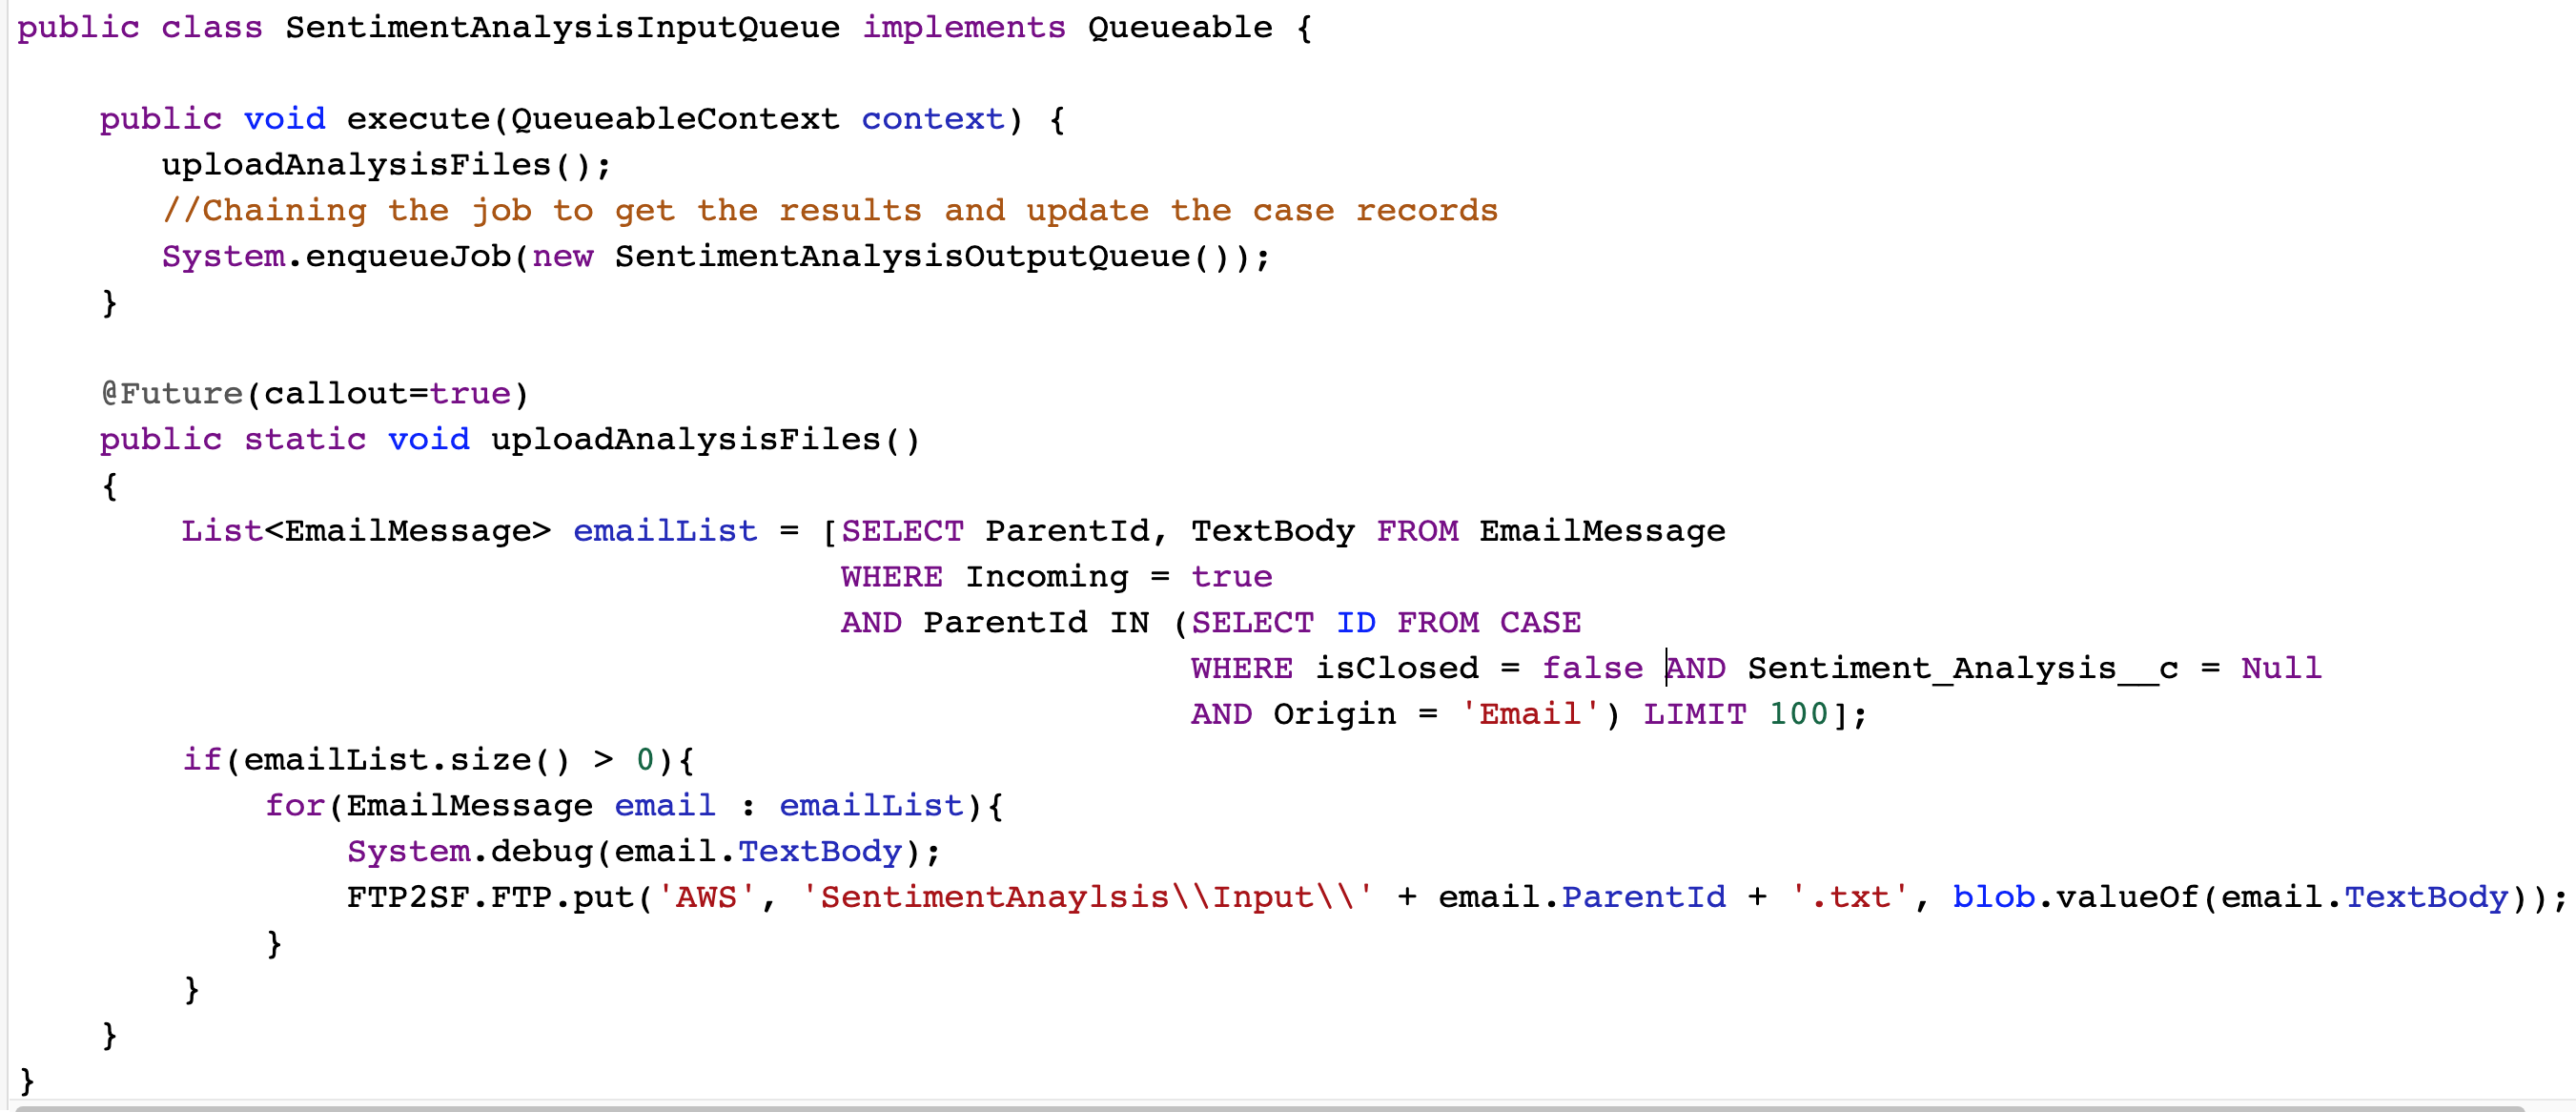
Write a trigger when a new ‘EmailMessage’ is created/inserted.

Get the ‘Case’ records which have their ‘Sentiment_Analysis__c’ value as null and upload their email content to AWS as below.
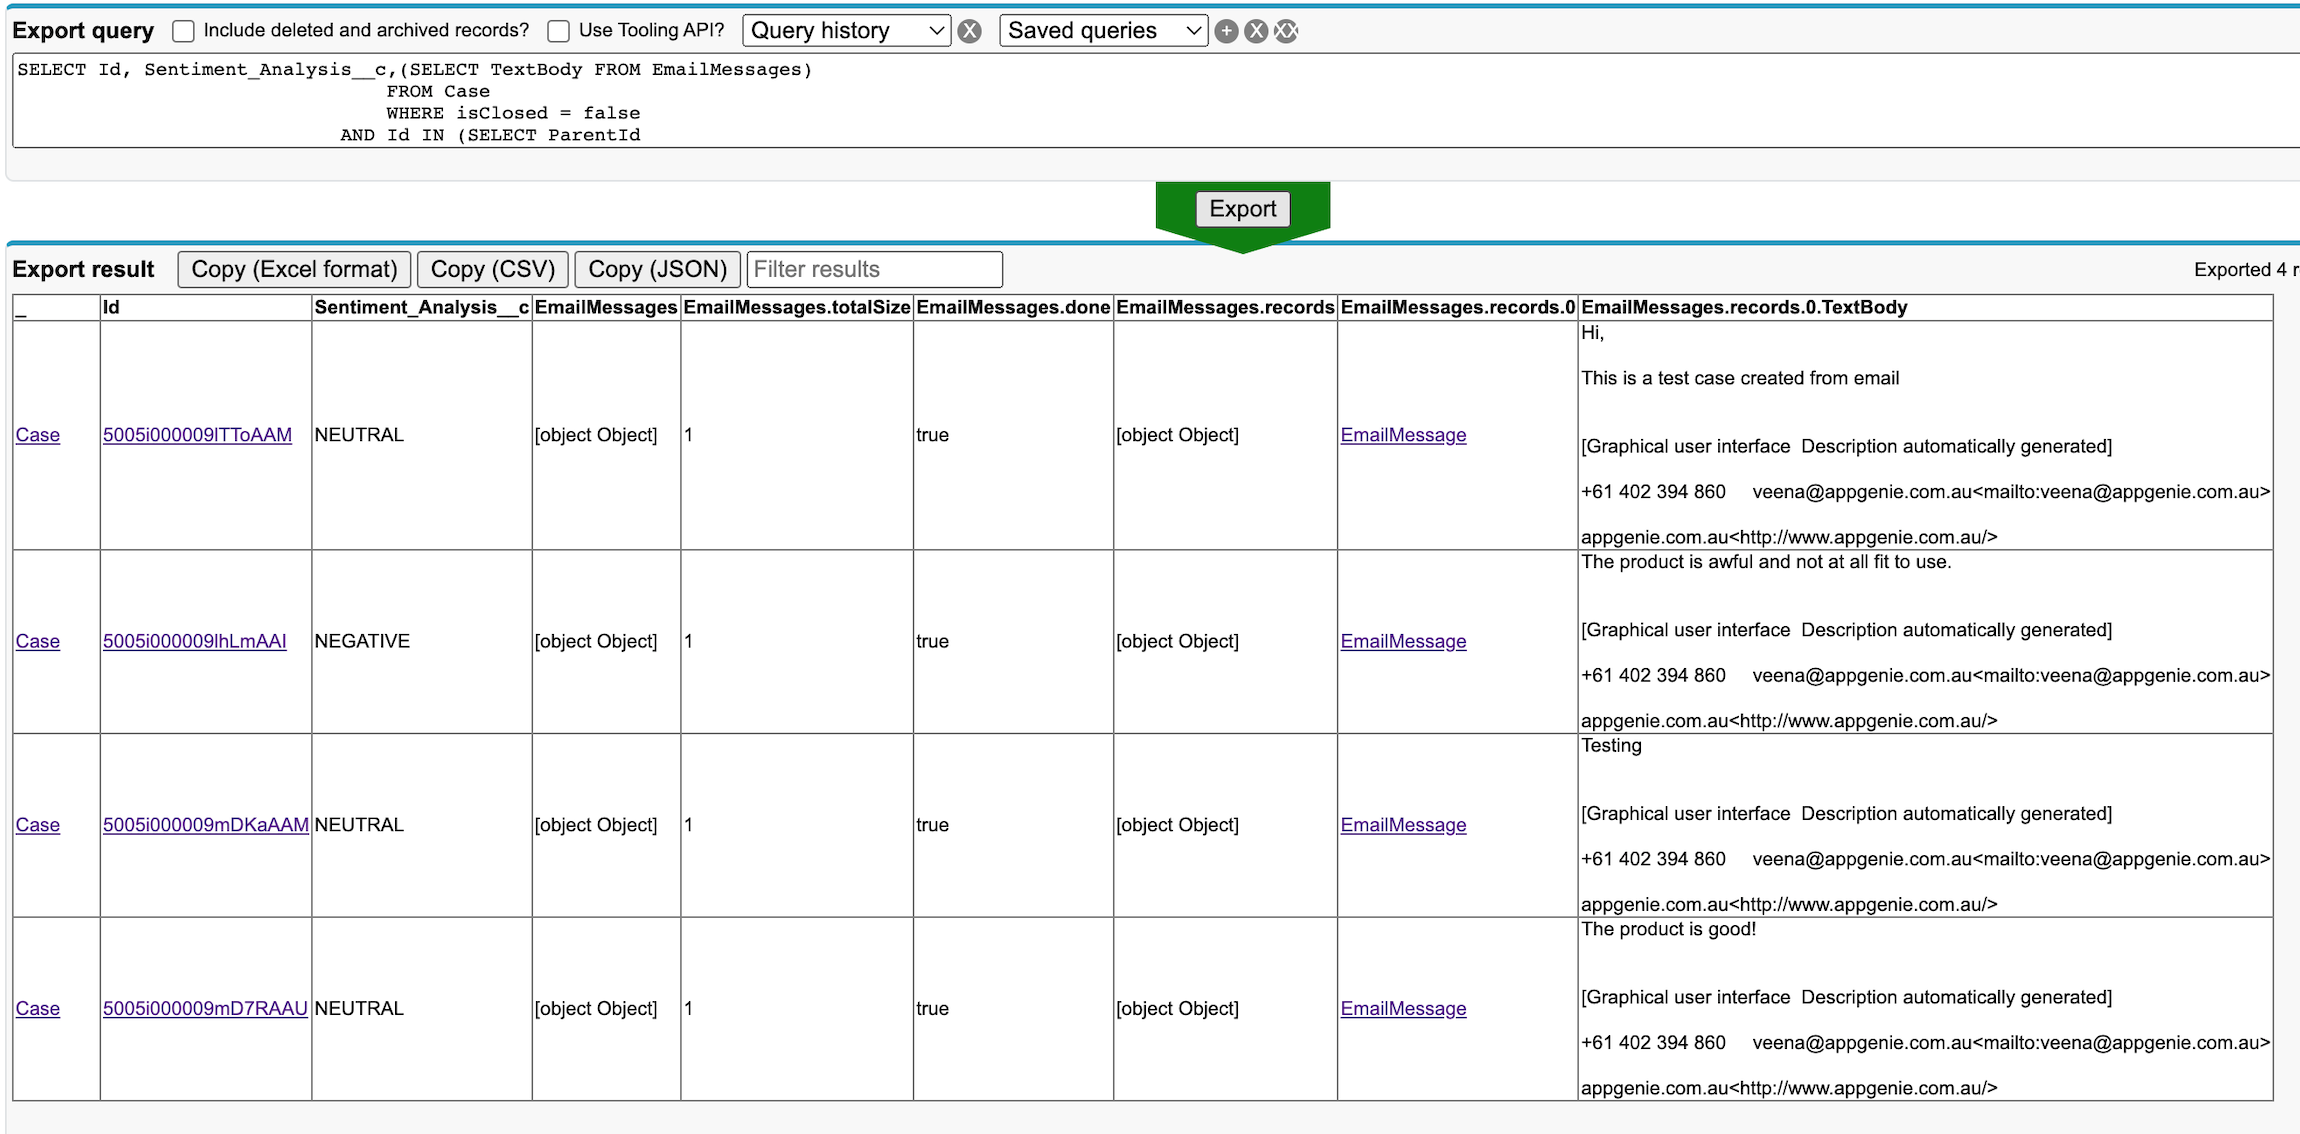
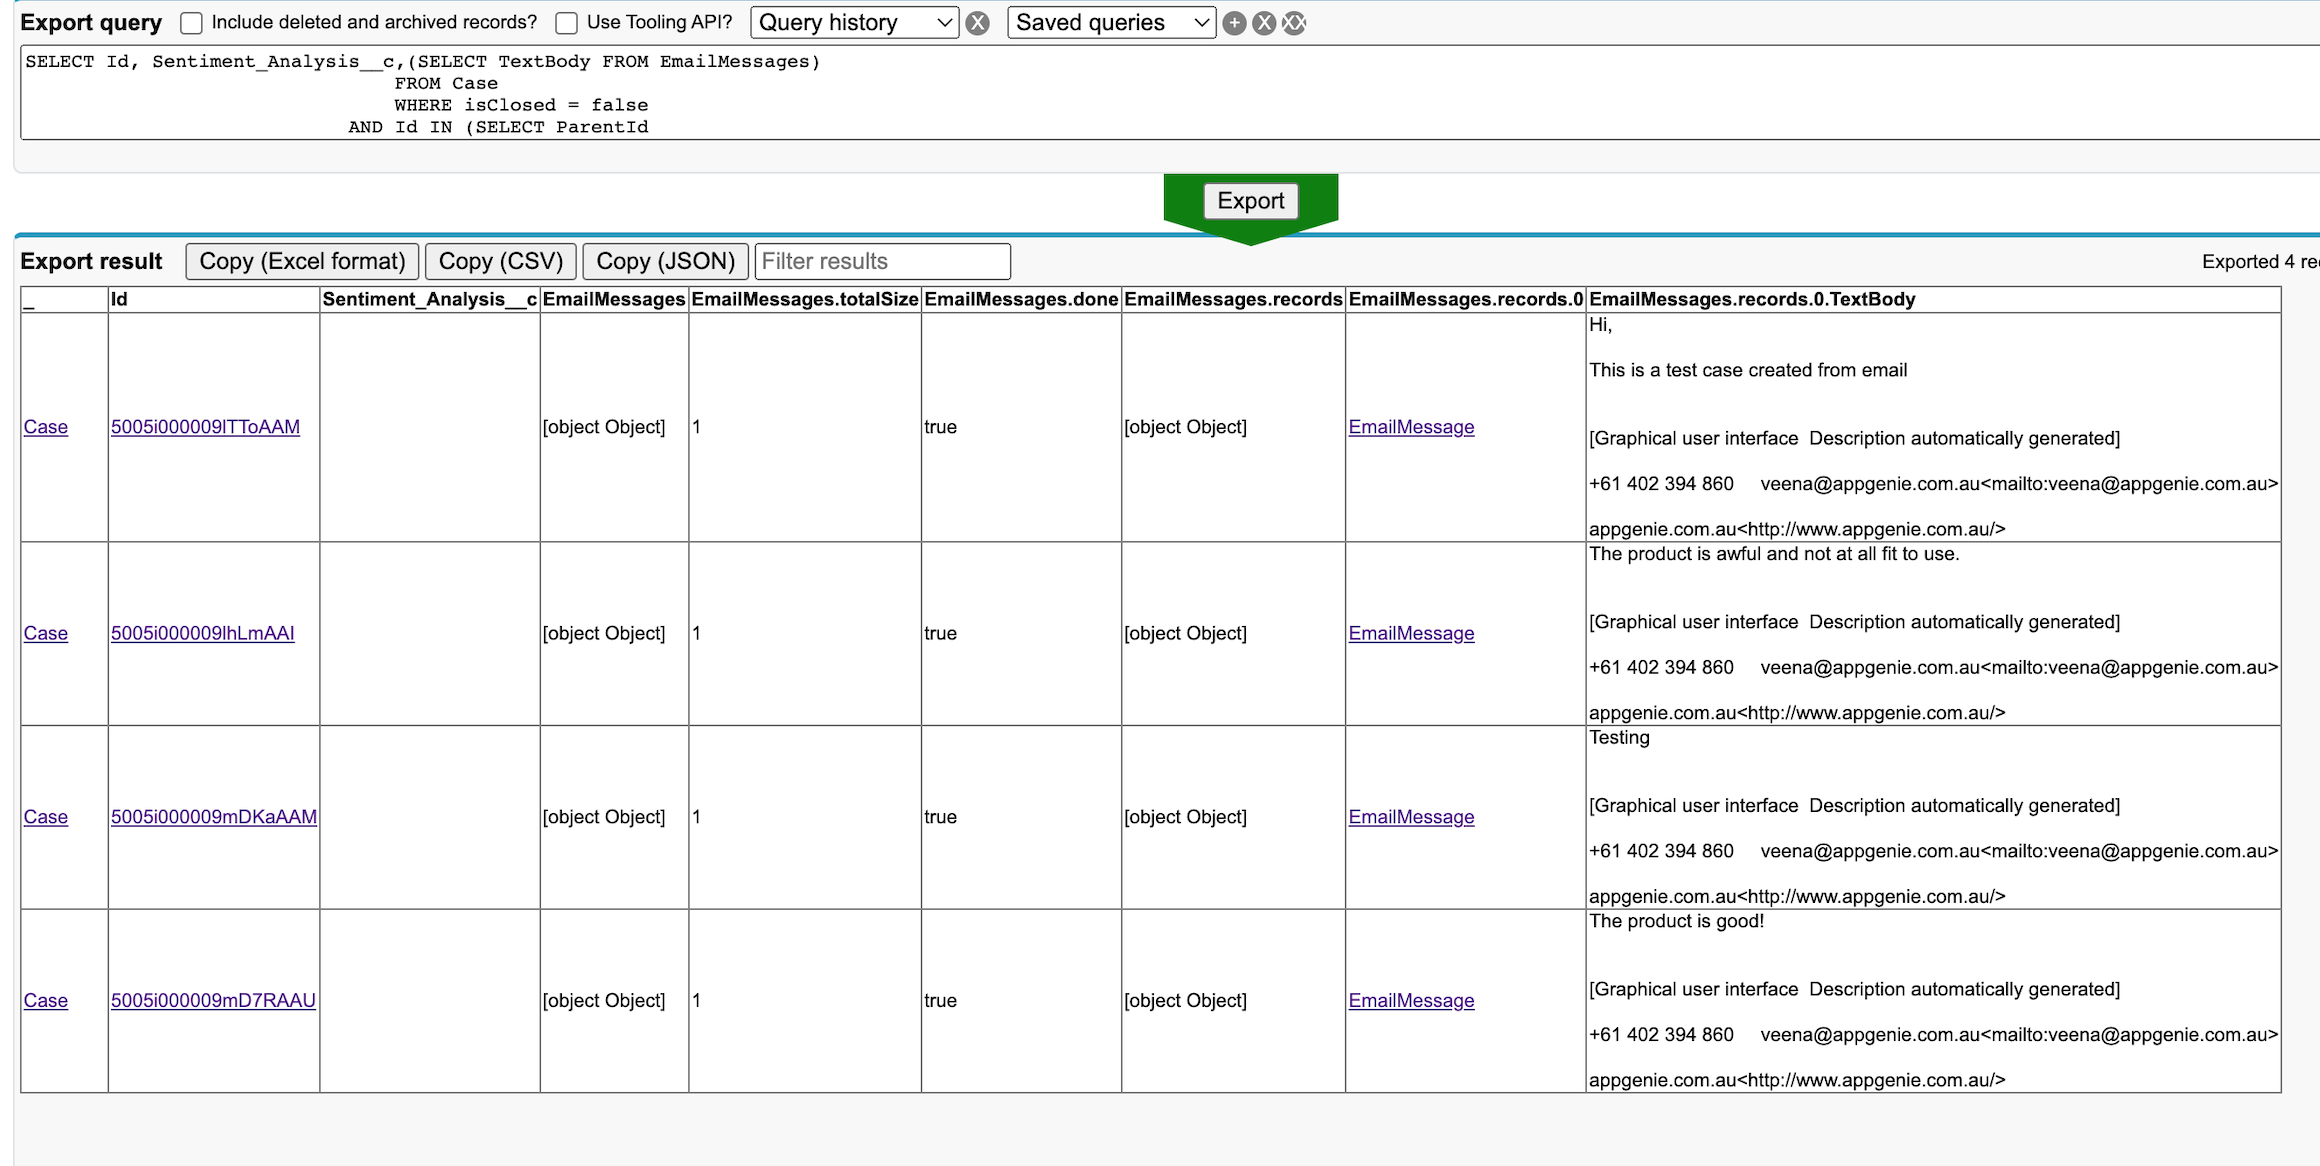
Below is the list of ‘Case’ records whose ‘Sentiment_Analysis__c’ value is null.
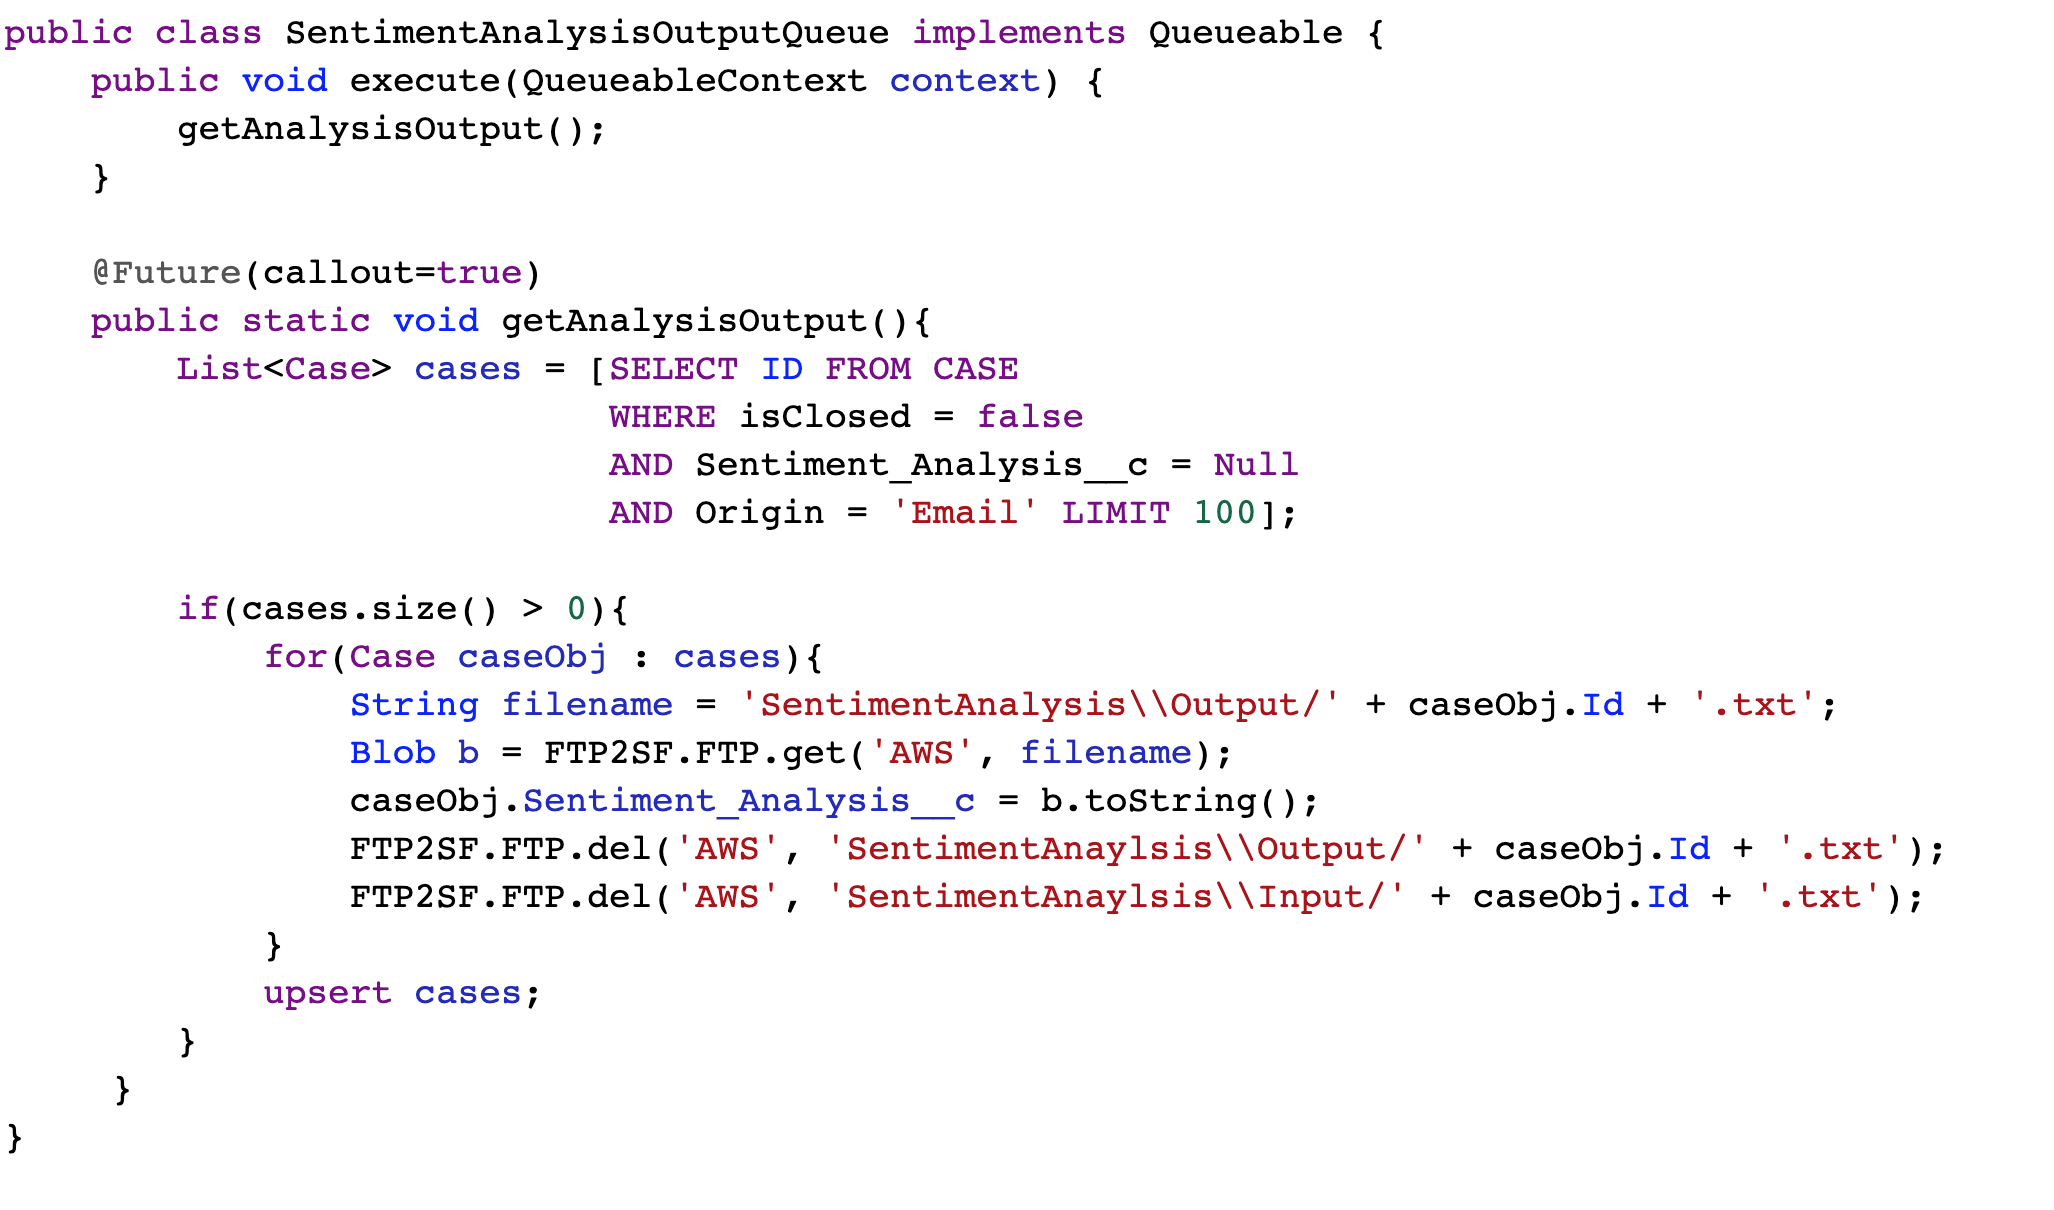
The code in the chained queueable below reads the result from the ‘AWS’ files and updates the ‘Case’ records and deletes all the associated files from ‘AWS’ bucket.
Below is the list of ‘Case’ records whose ‘Sentiment_Analysis__c’ value has been updated based on the Sentiment Analysis results from ‘AWS’.